NFT Collections are groups of NFTs with similar artistic styles and attributes. In this blog, we will see how we can create and add NFTs to a particular collection on Solana.
An NFT collection is a group of related digital assets, which consist of a number of NFTs that all have the same artistic style, with minor variations in design and attributes. All NFT Collections are nothing but one-of-a-kind NFTs on the blockchain with unique addresses (with max supply equal to 0), and all the related NFTs are associated with it.
In this blog, we will see how we can mint a new NFT to an NFT collection with a specified address on Solana using SHYFT’s create_v2 API.
Read SHYFT Documentation here.
Before getting started
To get started, we will need a few things.
Authentication: Getting your Shyft API key
x-api-key is an authentication parameter, which gives you access to SHYFT APIs. You can get your own API Key from the SHYFT website. Just signup with your email id here and you can get it for free.
Phantom Wallet
We will need the Phantom wallet browser extension, you can download it from the link below.
Once done, set up your Phantom wallet account. On-screen tips are available, which will guide you through setting up and getting started. You can also find a detailed guide related to this here.
What are NFT Collections?
An NFT collection is a group of digital assets released by one or more artists, containing a limited number of individual NFTs of similar artistic style and attributes. Under the hood, all NFT collections are also NFTs, with their max supply being equal to zero. This means, collections are in fact one-of-a-kind NFTs, and they too have unique addresses(mint addresses) like other NFTs. The mint address in case of collections is referred to as the collection address(or collections ids).
One example of NFT collections would be DeGods NFTs. This is one of the most popular Solana-based NFT collections, made up of 10,000 deflationary PFP NFTs.
Accepting NFT details
The details of the NFT being created and added to the collection has to be supplied as parameters of the API call. We have used React to construct a form for collecting this data from the user.
Press enter or click to view image in full size

Form for collecting NFT details and collection address
This collected data can now be used as parameters for the API call.
The API for creating and adding NFT to a collection
We use the following API endpoint for creating and adding an NFT to a collection.
POST https://api.shyft.to/sol/v2/nft/createThis API accepts x-api-key parameter in the header, which is an authorization parameter used by SHYFT for validating its users. You can get your own **x-api-key** from the SHYFT website for free here. The Content-Type for this API call is multipart/form-data.
This particular API from SHYFT provides a few striking features, such as provisions for adding collection addresses to specify the collection for the NFT being created, separating the gas fee payer from the NFT creator, allowing users to create NFTs in a gasless manner, adding a service charge for the service provider and many more.
Read the SHYFT API Documentation here.
Parameter Details for this API call
network: Selects the Solana Blockchain network instance.creator_wallet: Selects the wallet which will have theupdate_authorityof the NFT being created.name: name of the NFT being created.symbol: symbol of the NFT that is being created.description: a small description of the NFT.collection_address: This is an optional parameter that specifies the collection address, to which the NFT will be added after it is created.attributes: This accepts the NFT metadata in a specified format. Each attribute has atrait_typeandvaluefield in the following format.
{ trait_type: "Speed", //the first attribute value: "25", //its value},{ trait_type: "Accuracy", //the second attribute value: "98",//its value},max_supply: Number of edition NFTs that can be minted for this particular NFT. This field should be set to 0 when creating collections, as collection NFTs cannot have editions.image: Selects the NFT image.service_charge: Specifies the receiver, token, and the amount which will be deducted as a service charge. This is an optional parameter and can be used to pay a small service charge to the service provider.
{ "receiver": WALLET_ADDRESS_OF_THE_SERVICE_CHARGE_RECEIVER, "token": TOKEN_ADDRESS_OF_THE_AMOUNT, //SOL if left blank "amount": 0.5 //service charge amount}fee_payer: Specifies the wallet address from which theservice_chargewill be deducted. If left blank, the service charge will be paid by thecreator_wallet.
You can also try out our APIs in Swagger UI here.
Get Team Shyft’s stories in your inbox
Join Medium for free to get updates from this writer.
Once we have collected all the data via the form created in the previous step, we append it to an FormData object and use that as a parameter for the API call.
const formData = new FormData(); formData.append("network", network); formData.append("creator_wallet", creator); formData.append("name", name); formData.append("symbol", symbol); formData.append("description", desc); formData.append("attributes", JSON.stringify(attr)); formData.append("external_url", extUrl); formData.append("max_supply", maxSupply); formData.append("royalty", royalty); formData.append("collection_address",collAddr); formData.append("image", image);We have used the axios package to make the API call, but any other method also can be used
axios({ // Endpoint to get NFTs URL: "https://api.shyft.to/sol/v2/nft/create", method: "POST", headers: { "Content-Type": "multipart/form-data", "x-api-key": "YOUR_API_KEY", //You x-api-key from SHYFT Website }, data: formData, })Once the request is successfully executed, we should receive a response somewhat similar to this.
{ "success": true, "message": "NFT create request generated successfully", "result": { "encoded_transaction": "AhAAAAAAAAAAAAAAAAAAAAAAAAAAAAAAAAAAAAAAAAAAAAAAAAAAAAAAAAAAAAAAAAAAAAAAAAAAAAAAADd/kZ7nuc7bHY1UZVoVPsZ2Slp+9Sz9dwdHYG7/EP0XTgUn5L1oPWrbCiWyhASqoz4vROwbl2Neo1exHuYvnYIAgAID0mioYxx/asdasdsSls7U3Uq1cPiWEWioadmJJkpfEpJj1IRPDYHVKLFdzmKAhEV5ABsw3PbAIcv3yNkm3z5V2dA0oNsKtkdrxCZh81eIaZc6sHtpoVRDXqCwk2sxG3tUhDS4Opo80GCvyIr4gr+MfwhU03cnO9eEM/I2BvSTn8atGSgv4jEnlxkrsXIO3WpLa65+YPE+hVbcdZfoTSlkuSZace5SwBw7BnI9z9u9hPXYCyNkAAWPPPEqUQJe24xjrsbmyqqUL4gQg6etSyylLP4PMcsG5bcYK4xg9sKxkzNEVAAAAAAAAAAAAAAAAAAAAAAAAAAAAAAAAAAAAAAAAAAAYyp9RxUce7b6XJTmDH3BTasbGTY2hJe2h0xJ16/4PFYyXJY9OJInxuz0QKRSODYMLWhOZ2v8QhASOe9jb6fhZzgOeiS4FIAsM7m2Xp1OR42r2qbdt9WblPm7k6dy0XkQLcGWx49F8RTidUn9rBMPNWLhscxqg/bVJttG8A/gpRgan1RcZLFxRIYzJTD1K8X9Y2u4Im6H9ROPb2YoAAAAABt324ddloZPZy+FGzut5rBy0he1fWzeROoz1hX7/AKkOmNc6v7OEyaYVVIa6Sv4A/AgVM+wz147I5bRZEbS74yKOCI5qZRvBPiwWe60BzPA23jIRrCRiPj2oAj/VJbo9BQcCAAE0AAAAAGBNFgAAAAAAUgAAAAAAAAAG3fbh12Whk9nL4UbO63msHLSF7V9bN5E6jPWFfv8AqQ0CAQxDAABJoqGMcf65O3NEpbO1N1KtXD4lhFoqGnZiSZKXxKSY9QFJoqGMcf65O3NEpbO1N1KtXD4lhFoqGnZiSZKXxKSY9QkHAAMIAQcNDAANAwEDAAkHAQAAAAAAAAALDgYFAgEEAAAADggKDQcMCQsCAAAAAAAAAA==", "mint": "9FjMDMkhcuIggt5LyKDUf5FFpKBuSgmEaaoHKuwoegju" }}The API returns an encoded_transaction , which when signed will complete the transaction.
For details on all the parameters for this API endpoint, Read the SHYFT API Documentation here.
Signing the transaction
This encoded_transaction received in the response of the API call needs to be signed by two wallets, One being the wallet of the NFT creator, and the second, the collection owner (wallet with the update_authority of collection).
Check out our dev guide on how to sign transactions on Solana here.
First, let’s see how we can sign the transaction from the backend using the collection_address (collection owner) wallet. We use the following function for signing the encoded_transaction partially by the collection_addresswallet.
export async function partialSignWithKey(network, encodedTransaction, privateKey) { const connection = new Connection(clusterApiUrl(network),'confirmed'); const feePayer = Keypair.fromSecretKey(decode(privateKey)); const wallet = new NodeWallet(feePayer); const recoveredTransaction = Transaction.from(Buffer.from(encodedTransaction, 'base64')); recoveredTransaction.partialSign(feePayer); //partially signing transaction with privatekey of the collection owner return recoveredTransaction;}Here privateKey indicates the private key of the user that is signing the transaction partially(in our case which is the collection owner wallet). Next, we attempt to sign the recoveredTransaction received from this function with the creator_wallet.
export async function partialSignWithWallet(connection, encodedTransaction, wallet) {//we have to pass the recoveredTransaction received in the previous step in the encodedTransaction parameterconst signedTx = await wallet.signTransaction(encodedTransaction);//signing transaction with the creator_walletconst confirmTransaction = await connection.sendRawTransaction(signedTx.serialize());return confirmTransaction;}Once successfully signed by both wallets, the NFT will be created and added to the collection.
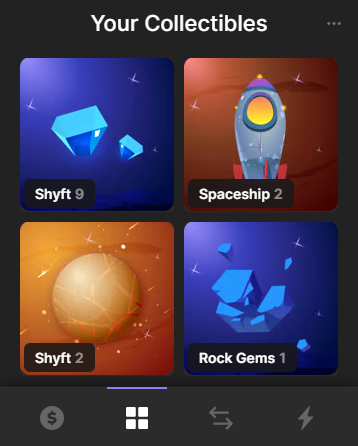
Newly created NFT added to Rock Gems Collection
Press enter or click to view image in full size

Newly created NFT with Verified Collection Address
So that’s pretty much everything about how we can add an NFT to a collection based on its collection address using SHYFT APIs. If you enjoyed this blog, feel free to check out our other tutorials on Gasless NFT creation, and on getting NFT collection details from a wallet.
You can find all the functions required to sign a transaction here, or you can also follow our dev guide on signing transactions.
SHYFT provides a wide range of Web3 APIs such as NFT APIs, Wallet APIs, Token APIs and many more, for building dApps on Solana Blockchain. Feel free to check out SHYFT’s API docs here.
You can also try out our APIs in Swagger UI here.
We hope you have a great time building dApps with SHYFT APIs. Happy Hacking!
Resources
Join our Discord